Creating an RFQ in Purchaser brings all your RFQs, vendors, and responses together in one place. Our flexible RFQ builder offers several ways to start, making it easy to send RFQs out to your existing vendors or new vendors.
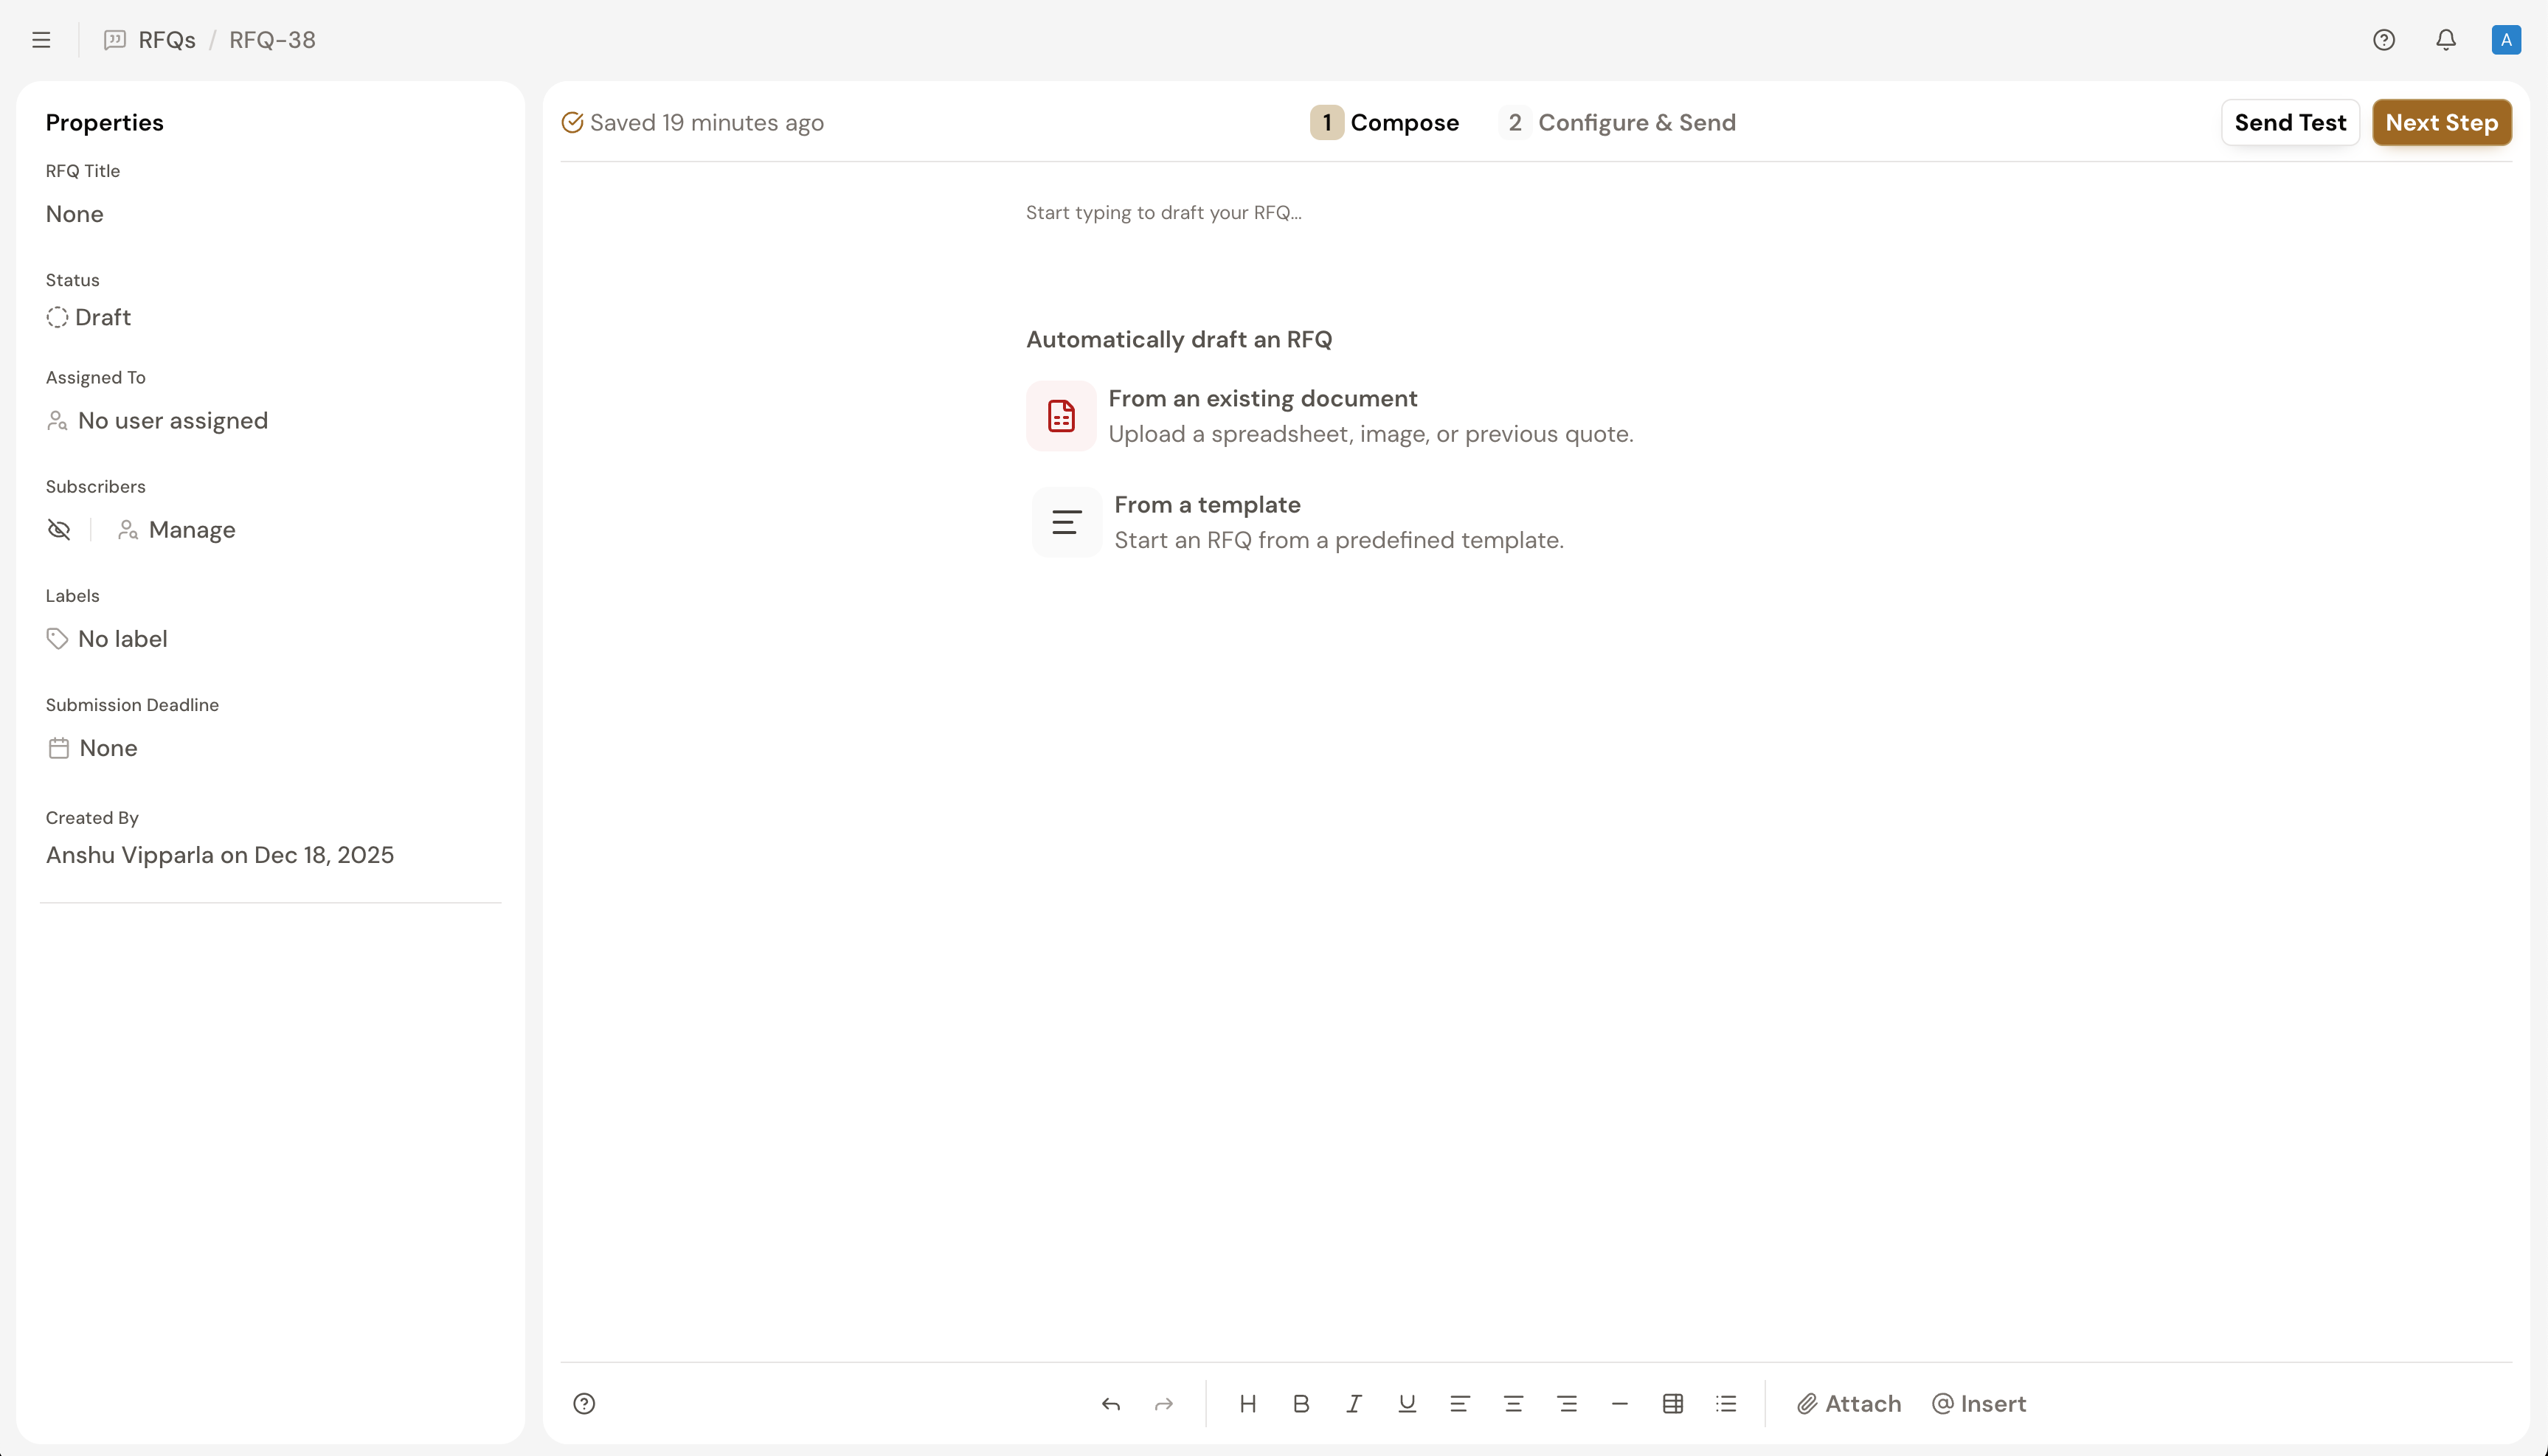
To begin, simply select Create RFQ on your RFQs tab and choose the option that best suits your needs.
You can start with a document, an existing template, copy from an existing spreadsheet, or start from scratch.
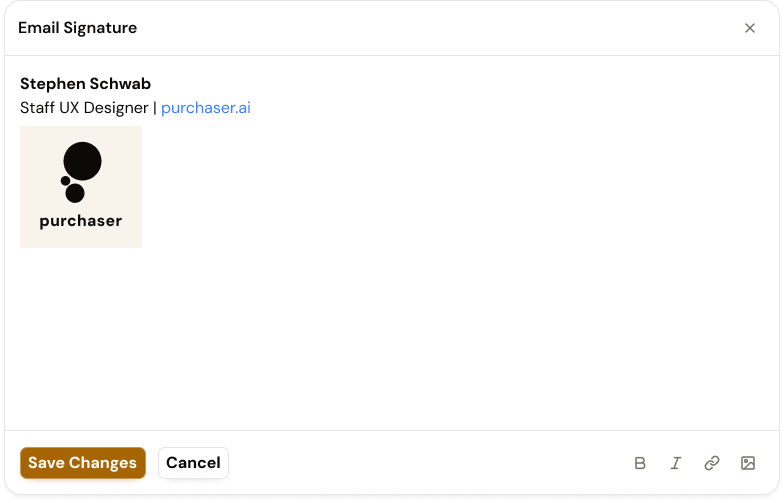
Adding an email signature provides a professional touch to your emails, enhances brand recognition, and ensures recipients have your contact information readily available.
To add an email signature:
Your new signature will now automatically appear in the current RFQ and all future RFQs you create.
If you already have an email signature in your Google workspace, you can import your signature. To learn how to visit our Integrate With Your Email guide.
To Edit or Remove Your Signature:
To update your signature, open the signature canvas within any draft RFQ. After selecting Save Changes, your updated signature will automatically apply to all future RFQs.
To remove your signature, simply delete all the content from the text field and select Save Changes. This will remove your signature from all future RFQs.
Before sending your RFQ, you can fill in optional properties that can help you organize and track your RFQ even before it is sent. While these fields remain accessible after sending, configuring them now may help streamline your process.
Adding these details now ensures your RFQ is organized from the moment it’s created. You can still edit or adjust any of these fields after the RFQ is sent.
For complex RFQs, you have the option of sending a test email to yourself to verify formatting, attachments, and overall clarity. Select Send Test to deliver a preview to the email you're currently logged in as. While the RFQ editor provides a preview of the email, the test email ensures you see exactly what your vendors will receive to help you make sure your RFQ is ready to send.
Once your draft is ready, select Next Step to proceed to the Configure & Send step of creating an RFQ. At this step you can finalize your email settings, including the subject line, sender address, and recipient list.

Add Vendors/Recipients:
This is where you can to add vendors that you want to send this RFQ to. Unlike traditional email, Purchaser automatically groups contacts by company and sends separate, individualized emails to each vendor. This ensures your vendor list remains private and prevents accidental disclosure of your bidding pool.
Once you're satisfied with your recipients, select Send RFQ to email your RFQ to all the recipients you’ve added.
Once your RFQ is sent, Purchaser helps you effortlessly manage responses and compare quotes. We organize all incoming responses, making it simple to track which RFQs have received replies, which have quotes, and more. This significantly streamlines the entire process for you and your team.
To dive deeper into how we simplify RFQ management, explore our Respond to RFQs guide.
Still got questions? Contact Us or Book a Demo to learn more about how Purchaser can fit into your workflow.